
November 2, 2026
Reducer Repair Clamp Buyer's Guide: Selection, Verification, and Supplier Questions
A procurement-focused guide to reducer repair clamps: how they differ from sleeve clamps and expansion joints, what to specify, how to verify a supplier, and which questions to ask before ordering.
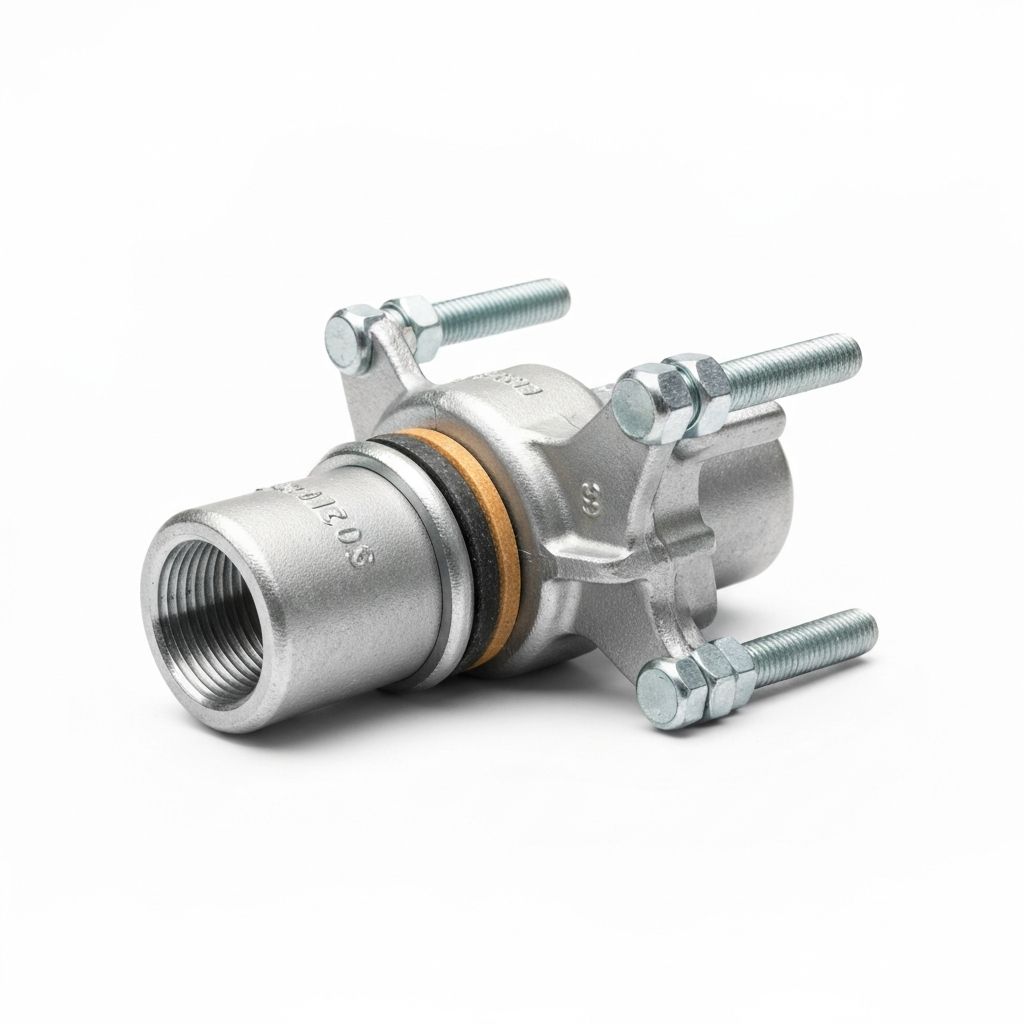
What a reducer repair clamp is and when it fits
A reducer repair clamp is a pipe repair fitting intended to seal or reinforce a damaged section at or near a pipe size transition, where a larger-diameter pipe meets a smaller one through a reducer. The clamp wraps the affected area and is tightened to create a seal around the pipe circumference. It is a repair and reinforcement option, not a replacement for a properly installed reducer fitting.
Buyers typically reach for this category in three situations: a leak or corrosion spot has appeared close to a reducer, the reducer joint itself needs external reinforcement, or maintenance teams want to avoid cutting out and re-welding the transition. Whether a reducer repair clamp is the right choice depends on pipe material, outside diameter, surface condition, line pressure, and whether the reducer geometry leaves enough straight pipe for the clamp to seat.
This guide is written for the buyer moving from consideration into supplier evaluation. It focuses on the decisions you must make, the specifications to put in an inquiry, and the evidence to request before committing to an order.
Reducer repair clamp vs. sleeve repair clamp vs. valve expansion joint
These three products sit in the same pipe repair family but solve different problems. Confusing them is one of the most common sourcing errors, because a part that fits one application may be unsuitable for another.
| Product | Primary job | Typical mounting point | Key selection risk |
|---|---|---|---|
| Reducer repair clamp | Seal or reinforce damage at or near a pipe size transition | Reducer area where larger and smaller pipe meet | Insufficient straight pipe or wrong diameter range for the clamp to seat |
| Sleeve repair clamp | Full-circumference seal over a damaged section, including pipes with protruding obstructions | Straight pipe runs, including areas with flange discs or other surface obstructions | Clearance around the obstruction and sleeve length versus damage extent |
| Valve expansion joint | Anti-vibration protection and thermal expansion compensation at a valve connection | Pipe-to-valve junction: flange on one side, clamp on the adjacent pipe on the other | Flange compatibility and the movement the joint must absorb |
The sleeve repair clamp is the closest relative. Its sleeve-type design wraps around the affected area to create a full-circumference seal and is described as suitable for pipes with protruding foreign objects such as flange discs and flange expansion joints. If your damage sits on a straight run next to a flange rather than at a reducer, a sleeve clamp is usually the more direct fit.
The valve expansion joint addresses a different failure mode. It connects to a valve flange on one side and grips the adjacent pipe with a clamp on the other, providing anti-vibration protection and compensating for thermal expansion at valve junctions. It is used in pipe-to-valve connections, pump stations, and temperature-variable pipeline systems. If the problem is movement or vibration at a valve rather than a leak at a reducer, this is the category to evaluate.
Specifications to put in a reducer repair clamp inquiry
A vague inquiry produces vague quotes. The following details let a supplier confirm fit and give you a comparable offer. Where a value is unknown, say so explicitly rather than guessing.
- Pipe outside diameter at both sides of the reducer. Outside diameter, not nominal size alone, is what determines whether a clamp can grip. State the measurement method if it matters.
- Pipe material. Steel, cast iron, ductile iron, PVC, and HDPE behave differently under clamp pressure. Material affects gasket choice and tightening limits.
- Line contents and temperature. Water, wastewater, and industrial fluids impose different requirements on the gasket and body material.
- Operating pressure and test pressure. Give the normal working pressure and the pressure the repair must withstand during testing.
- Damage description. Leak, pinhole, corrosion patch, circumferential crack, or joint separation. Include the length of the affected zone along the pipe.
- Available straight length. How much unobstructed pipe exists on each side of the reducer for the clamp to seat on.
- Surface condition. Coating, scale, pitting, or protruding objects that could prevent a seal.
- Access and installation constraints. Trench width, overhead clearance, and whether the line can be depressurized.
- Quantity and delivery destination. Include the port or site and any packaging or documentation requirements.
If the reducer is close to a wall, flange, or another fitting, say so. The clamp needs room to wrap and tighten, and a supplier cannot judge that from a pipe diameter alone.
Selection criteria that separate a workable clamp from a return
Reducer repair clamps are not interchangeable across all pipe sizes and conditions. Evaluate suppliers on these criteria, and ask for evidence rather than assurances.
Diameter range and taper accommodation
A clamp designed for a single diameter may not seal across a reducer where the two pipe sizes differ. Confirm the diameter range the clamp covers and whether it is intended for the specific size pair in your line. Ask how the clamp behaves at the transition itself, not only on the straight sections.
Gasket and body material
Gasket material must match the fluid and temperature. Body material must suit the environment, including buried, indoor, or corrosive service. Request the material specification in writing and check it against your line conditions.
Pressure rating and test basis
Ask what pressure the clamp is rated for and how that rating was established. A rating without a stated test basis is difficult to compare across suppliers. Clarify whether the rating applies to the clamp alone or to the clamp installed on the pipe material you will use.
Installation envelope
Check the clamp's overall length, bolt count, and the tool clearance needed to tighten it. A clamp that fits the pipe but cannot be tightened in a narrow trench is not a solution. For live-line work, confirm whether the design allows installation without shutting down flow; the pipe expansion joint product in this family is described as installable without cutting the pipe or stopping flow, but that property should be confirmed per product rather than assumed across the category.
Documentation and traceability
For municipal or industrial buyers, request material certificates, dimensional drawings, and inspection records where available. Documentation quality is often a better predictor of consistent supply than a single sample.
How to validate a sample before placing a bulk order
A sample that looks correct on a bench can still fail in service. Validate against the conditions the clamp will actually face.
- Dimensional check. Measure the clamp against the pipe outside diameters at both sides of the reducer. Confirm the clamp seats on the pipe, not on the taper alone.
- Fit trial on a pipe section. If possible, install the sample on a pipe section of the same material and diameter. Note how the gasket contacts the surface and whether tightening is even around the circumference.
- Pressure test. Test at the specified test pressure, not only at working pressure. Record the result and the conditions.
- Surface condition trial. If your pipe is pitted or coated, test on a representative surface. A clamp that seals on clean new pipe may not seal on aged pipe.
- Installation time and tooling. Time the installation with the crew and tools you will actually use. This reveals clearance and handling problems early.
Document each step. A sample evaluation with recorded results gives you a defensible basis for approving a supplier and a reference point if field performance differs later.
Supplier questions worth asking before you commit
Use these questions in the inquiry or during a supplier audit. The quality of the answers, and the willingness to answer in writing, tells you as much as the answers themselves.
- Which diameter pairs and pipe materials has this clamp design been used with?
- What is the pressure rating, and what test basis supports it?
- What gasket and body materials are available, and which do you recommend for my fluid and temperature?
- Can you provide a dimensional drawing for the size I need?
- What is the installation procedure, and what tools are required?
- How is the product packaged for export, and what documentation accompanies each shipment?
- Can you supply a sample for fit and pressure testing before a bulk order?
- How do you handle a size or fit issue after delivery?
Ask for answers by email so the specification is on record. Verbal assurances are difficult to rely on when a shipment arrives and a dimension is wrong.
Warning signs in a reducer repair clamp offer
Some offers are easy to eliminate early. Watch for these patterns:
- A single clamp described as fitting all reducer sizes without a stated diameter range.
- Pressure ratings given without any test basis or reference to installation conditions.
- No dimensional drawing available before purchase.
- Gasket material not specified, or specified only as "rubber" without a grade.
- Reluctance to supply a sample or to answer technical questions in writing.
- Quotes that omit pipe material, fluid, or temperature assumptions, making comparison impossible.
None of these alone proves a supplier is unsuitable, but each adds risk. In a repair application, a clamp that does not seal costs more than the price difference between two offers.
Where the reducer repair clamp fits in a repair program
Reducer repair clamps are one tool in a broader pipe repair inventory. A maintenance program that also stocks sleeve repair clamps and valve expansion joints can cover more failure modes without custom fabrication for every event. The sleeve clamp handles obstructions and straight-run damage; the valve expansion joint addresses movement and vibration at valve connections; the reducer clamp addresses the transition zone.
For buyers sourcing from international suppliers, the practical next step is to assemble a specification sheet from the list above, send it with a request for a dimensional drawing and material data, and ask for a sample for fit and pressure testing. That sequence turns a category search into a verifiable purchasing decision.